Accretech Surface Texture Measuring Instruments (Surfcom Touch 35/40/45 Series)
Specifications
Details
Features
Selectable From 3 Types According To Application
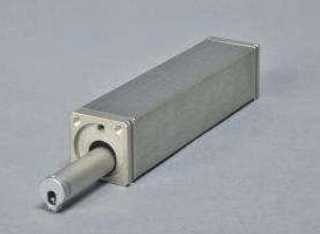
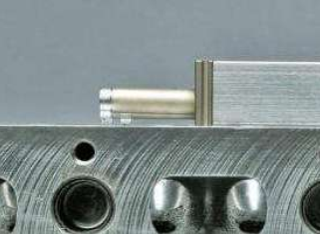
Retract-type that reduces damage to the stylus and pickup by raising the pickup while waiting for measurement or at ending. It can be used as a detector incorporated into an automatic machine.
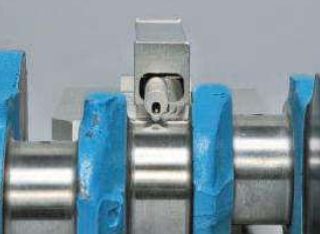
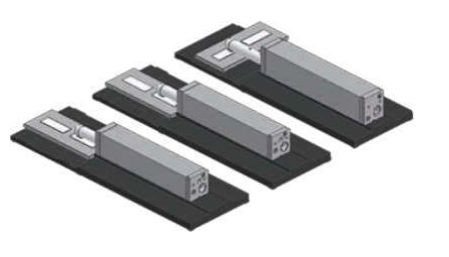
A Calibration table provided as a standard accessory makes calibration work easy
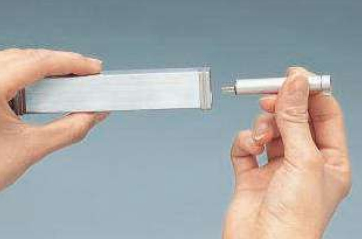
A roughness specimen for surface texture and a driver selected above are set to the standard calibration table.
Calibration can be conducted easily without need of height and inclination adjustment of the driver as before.
Optional pickups allow for various types of measurement
The pickups, that comes in contact with the workpiece is replaceable. Various types of workpieces can be measured by using optional pickups such as those for small or extemely small holes, deep groves, etc..
.png)
Easy-to-Use Screen
An amplifier with a 7-inch wide touch panel and easy-to-use new interface provides higher operability.
Easy-to-use operation eliminates the need of instructions.
Multi-language support available worldwide
20 Asian and European languages including Japanese, English and German are provided as standard. Language can be easily changed with one touch.
.png)
.png)
USB/micro USB ports as standard equipment
15 measurement conditions and 20 measurement results can be stored in the SURFCOM TOUCH amplifier.
More conditions and results can be stored by connecting a USB memory to the standard USB port.
The amplifier is also equipped with a micro USB port.
Measurement data can be transferred to the computer when connected with a USB cable, and a simple inspection report can be created using attached SupportWare II.
Measurement results can be printed quickly
The dedicated printer allows for quick printing of measurement results.
Of course, any measurement data saved in the amplifier or USB memory can be output.
.png)
Specifications
| Model | SURFCOM TOUCH | ||||||
| 35 | 40 | 45 | |||||
| Type | Tip Radius 5µm | Tip Radius 2µm | Tip Radius 5µm | Tip Radius 2µm | Tip Radius 5µm | ||
| Measuring Range | Z Direction | -210 ~ +160 | |||||
| Drive Axis | X-direction 16 | Y-direction 16 | |||||
| Tracing Driver | Movement Type | Standard Type | Retraction Type | Horizontal Tracing Type | |||
| Evaluation Length (mm) | 0.2 to 16.0 | 0.2 to 4.0 | |||||
| Measurement Speed (mm/s) | 0.5, 0.6, 0.75, 1.0 | 0.6 | |||||
| Pick-Up | Sensing Type | Differential Inductance | |||||
| Measurement Method | Skid | ||||||
| Z Direction Resolution | 0.0007μm/-210 to 160μm | ||||||
| Model | E-DT-SM10A | E-DT-SM49A | E-DT-SM10A | E-DT-SM49A | E-DT-SM39A | ||
| Stylus | Measurement Force | 4mN | 0.75mN | 4mN | 0.75mN | 4mN | |
| Tip Radius | rtip = 5µm | rtip = 2µm | rtip = 5µm | rtip = 2µm | rtip = 5µm | ||
| Tip Angle | 90° cone | 60° cone | 90° cone | 60° cone | 90° cone | ||
| Tip Material | Diamond | ||||||
| Analysis Item | Calculation Standard | Comply with JIS2013/2001, JIS1994, JIS1982, ISO1997/2009, ISO13565, DIN1990, ASME2002/2009, ASME1995, CNOMO | |||||
| Parameter | Profile Curve | Pa, Pq, Pp, Pv, Pc, PSm, PΔq, PPc, Psk, Pku, Pt, Pmr(c), Pmr, Pδc, Rz82, TILTA, AVH, Hmax, Hmin, AREA, Rmax, Rz, Sm, Δa, Δq, λa, λq, Lr, Rsk, Rku, Rk, Rpk, Rvk, Mr1, Mr2, Vo, K, tp, tp2, Hp | |||||
| Roughness Curve | Ra, Rq, Rz, Rv, Rc, Rt, RSm, RΔq, Rsk, Rku, Rmr(c), Rmr, Rδc, Rz94, R3z, RΔa, Rλa, Rλq, Ry, Lr, Sm, S, tp, tp2, PC, RPc JIS, RPc ISO, RPc EN, Pc, PPI, Rp, Rmax, Rz.l, RS, Rmr2, Mr1, Mr2, Rpk, Rvk, Rk, Vo, K, A1, A2. Rpm, Δa, Δq, Htp | ||||||
| Motif | R, Rx, AR, W, Wx, AW, Rke, Rpke, NCRX, NR, CPM, SR, SAR, Wte, NW, SAW, SW, Mr1e, Mr2e, Vo, K | ||||||
| Evaluation Curve | Profile Curve, Roughness Curve, ISO13565 Special Roughness Curve, Roughness Motif Curve, Waviness Motif Curve, Upper Envelope Waviness Curve | ||||||
| Characteristics Graph | Abbot Curve, Amplitude Density Function, Power Graph | ||||||
| Filter | Filter Type | Gaussian, 2RC (phase compensation), 2RC (non-phase compensation) | |||||
| Cutoff Value | λc (mm) | 0.08, 0.25, 0.8, 2.5 | |||||
| λs (µm) | None, 2.5, 8, 25 | ||||||
| Amplification Indicator | Display | 7-inch color liquid crystal touch panel | |||||
| Data Output | USB connectors for USB memory x2 (model without printer) x1 (model with printer), Micro USB connector for USB communication x1 | ||||||
| Print Output | Standard function for models with printer and optional for models without printer (external printer unit) / Thermal recording paper width: 58mm (recording width: 48mm) | ||||||
| Language | Japanese, English, Chinese (Traditional Chinese, Simplified Chinese), Korean, Thai, Malay, Vietnamese, Indonesian, German, French, Italian, Czech, Polish, Hungarian, Turkish, Swedish, Dutch, Spanish, Portuguese | ||||||
| Specifications | Power Supply | Charging | Built-in battery (to be charged using AC adaptor), charging period: 3 hours (about 600 measurements can be take when fully charged) | ||||
| Power Supply | AC100 to 240V ±10%, 50/60 Hz, Single phase | ||||||
| Power Consumption | Maximum 80VA | ||||||
| External Dimension (W x D x H)/Weight | Printer-Equipped Model | Amplification Indicator: 320 x 167 x 44 mm/about 2kg for he entire system | |||||
| Models w/o Printer | Amplification Indicator: 252 x 167 x 44 mm/about 1.6kg for he entire system | ||||||
| Standard Accessories | Roughness Specimen (E-MC-S24C), Calibration Table (E-WJ-S1045A), touch pen (E-MA-S112A), printing paper (E-CH-S25A)*, Instruction manuals, SupportWare II nosepiece (V-type) (E-WJ-S536A)** | ||||||
View more about Accretech Surface Texture Measuring Instruments (Surfcom Touch 35/40/45 Series) on main site

